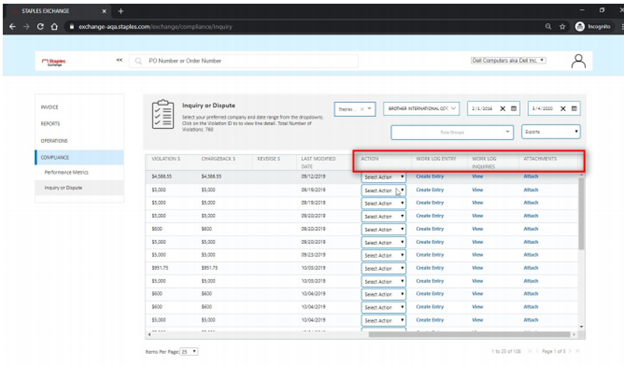
Target Dispute Process
Click Create New Case on the left navigation tab and select Dispute.
Enter the Document Number (Invoice or Deduction #) for the case you are disputing. Once you enter the number you will see a message indicating if the document number was found in the system or not.
You may see a popup message when keying in a document number for one of 3 reasons:
- Resolved cases already exist for this document
- The document is 18 months or older
- An open case already exists for this document.
If your document number is not found, double-check the number. If you are sure the document number is correct and the page still says Not Found, you will still be able to submit your dispute.
Choose your Deduction/Invoice Type. If your document number is found, this should auto-populate. If you are continuing the dispute with a document number not found, you will need to select the appropriate type for your dispute.
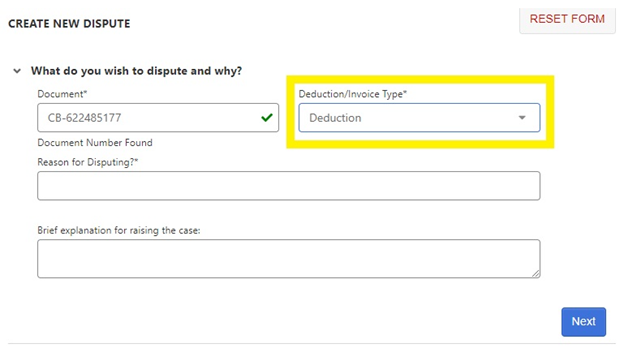
Select your reason for disputing from the drop-down box. You will only see reasons relevant to your Deduction/Invoice type selected.
Type a brief explanation to explain why you are submitting this dispute, as well as any information that may help Target as they research your dispute. When finished click Next.
Note: Once you click Next you can no longer edit the section above. If you need to change information in a previous section, click Reset Form at the top of the page. This will clear all data and you will start your dispute again.
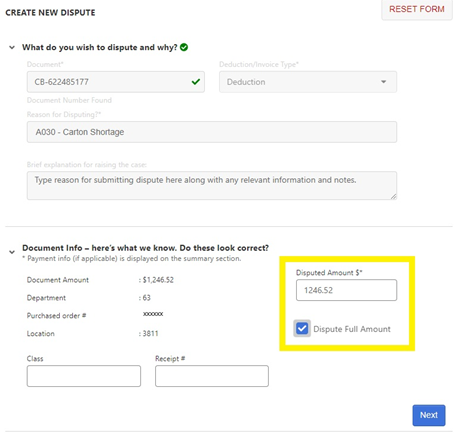
Verify any auto-populated information in the new boxes that have appeared. Fill in any fields that did not auto-populate. Anything with an * is a mandatory field.
The Disputed Amount will always need to be entered. You can type a number if you are only disputing a portion of the document, or click Dispute Full Amount to dispute the entire amount of the fine. Click Next.
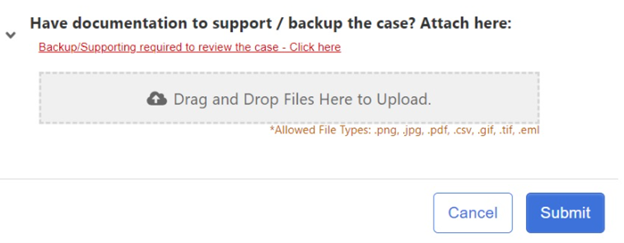
Upload any supporting documentation. For a list of required supporting documentation based on case type, see the Vendor Disputes section in the POL Library under Working with Target, Manage Accounts Payable, or see further down on this page.
Drag and drop files into the Upload area or click on the area to browse your device for files to upload. Once your files have been chosen, you will need to select the Attachment Type. Examples: Proof of Delivery, BOL, Invoice, Email Approval, etc. indicating what the document is that you are including.
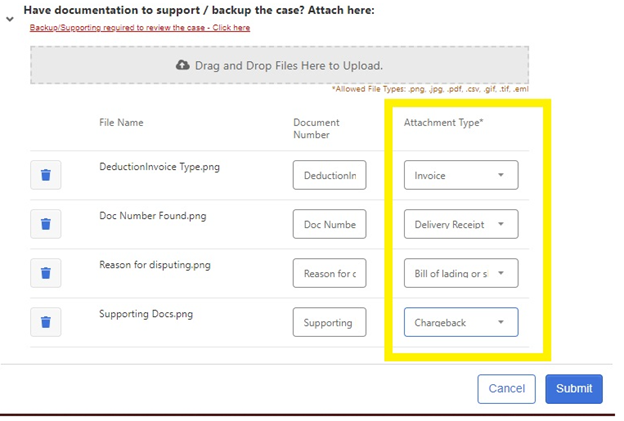
Once all files have been uploaded, click Submit. You will see a pop-up reminding you to include supporting documentation. Ensure your case and supporting documents are successfully loaded by the green approval dots that will display.
When your dispute has been successfully submitted, you will see the below screen, with a case number listed at the top. That number can be used to log in to Synergy at any time to view the case and supporting documents. Always monitor your Synergy dashboard for any cases that Target may send back to you as “Awaiting Vendor Info” status, meaning more information is required from you for your dispute.
